Creating a key
Click Create API Key to open the creation dialog. Fill in three fields: Name - a descriptive label so you can identify the key later (e.g.Automation script, CI pipeline).
Permissions - select the access scopes the key needs. Permissions are grouped by area:
Proxies
Proxies
| Permission | What it allows |
|---|---|
proxies:read | List and retrieve proxy details and configuration |
proxies:write | Create, update, and delete proxies; manage limits and whitelists |
geo:read | Access geo directory (countries, states, cities, ZIP codes) |
Statistics
Statistics
| Permission | What it allows |
|---|---|
stats:read | View traffic statistics and export usage reports |
Account & Billing
Account & Billing
| Permission | What it allows |
|---|---|
balance:read | View account balance, transaction history, and available plans |
proxies:write does not include proxies:read - assign both if your integration needs to both create and read proxies.
Expiration - choose how long the key stays valid:
| Option | Duration |
|---|---|
| 30 days | Key expires in 30 days |
| 90 days | Key expires in 90 days |
| 6 months | Key expires in 6 months |
| 1 year | Key expires in 1 year |
| No expiration | Key is valid indefinitely |
Saving the key
After creation, the Your New API Key dialog appears with the full key value and a Copy button. Click Done to close the dialog. From this point, only the key prefix (e.g.2xt_20fe...) is visible in the table.
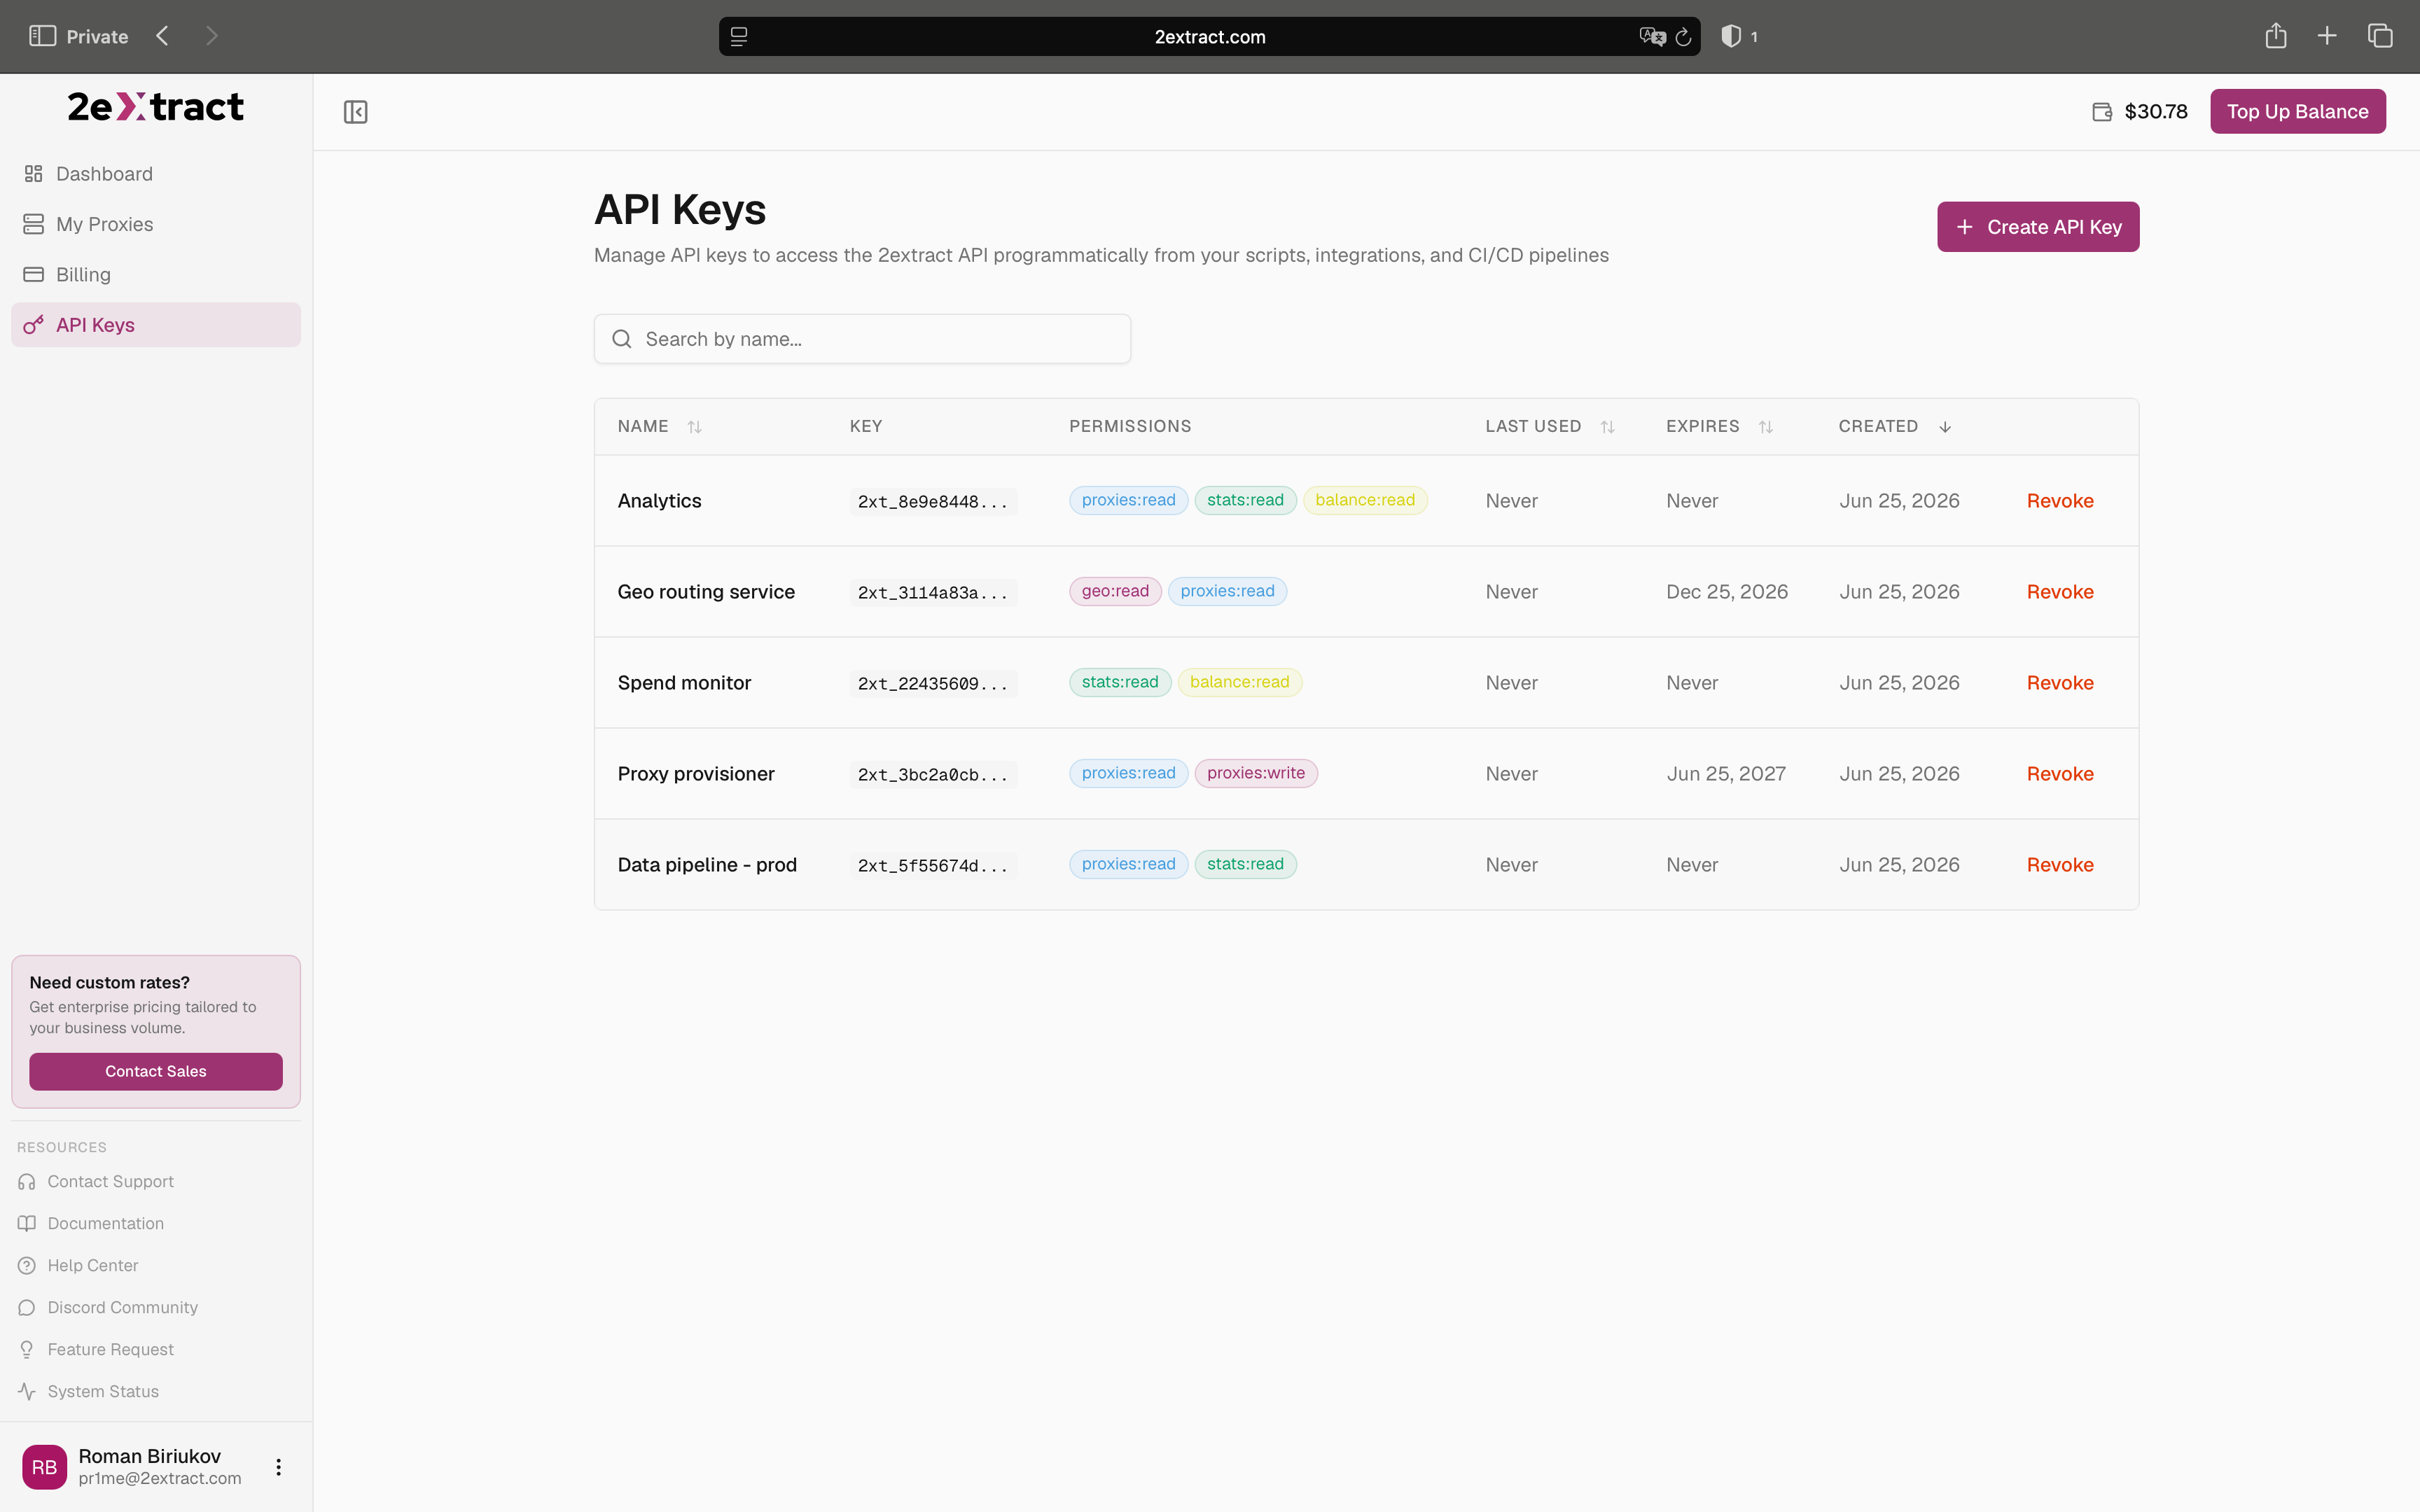
Viewing and managing keys
The API Keys page lists all active keys in a table with the following columns:| Column | Description |
|---|---|
| Name | The label you set at creation |
| Key | Truncated key prefix (e.g. 2xt_20fe...) |
| Permissions | Scopes granted to this key |
| Last used | When the key last authenticated a request |
| Expires | Expiration date, or empty if no expiration was set |
| Created | When the key was generated |
You can have up to 10 API keys per account. To create a new one when at the limit, revoke an existing key first.
Revoking a key
Click Revoke next to any key to open the confirmation dialog. Confirm by clicking Revoke in the Revoke API Key dialog. Revocation is immediate - any requests using the key will start returning401 Unauthorized instantly. This action is irreversible.
Revoke a key immediately if:
- It was accidentally committed to a repository
- A team member who had access has left
- You suspect it was leaked or compromised
Security best practices
One key per integration
Each script or service should have its own key. This way you can revoke a single key without affecting other integrations.
Minimal permissions
A monitoring script only needs
stats:read. A provisioning pipeline needs proxies:write. Never grant more than required.Use environment variables
Never hardcode keys in source code. Store them in environment variables or a secrets manager (Vault, AWS Secrets Manager, etc.).
Set an expiration
Prefer keys with an expiration date over indefinite ones. Rotate before expiry by creating a replacement key, updating your integration, then revoking the old one.